A place name how-to-guide to make this cute little umbrella with a beachy feel. Let us inspire you !
You Will Need:
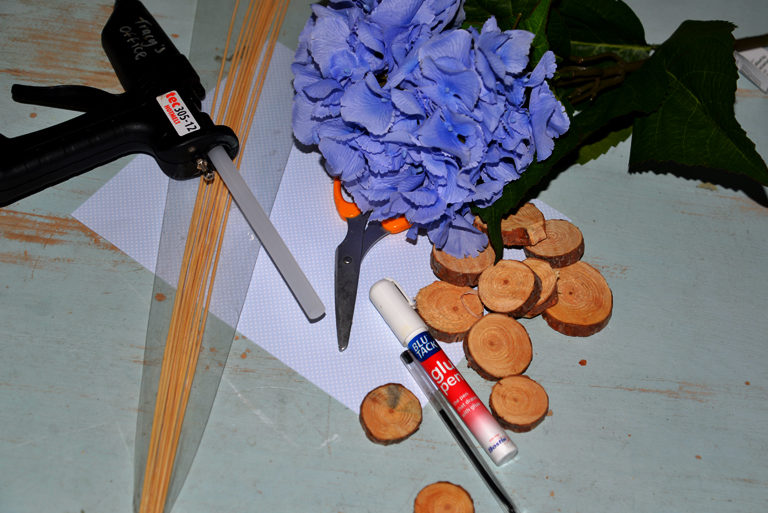
Extra large hydrangea stem blue
Patterned card
Pen
Step 1
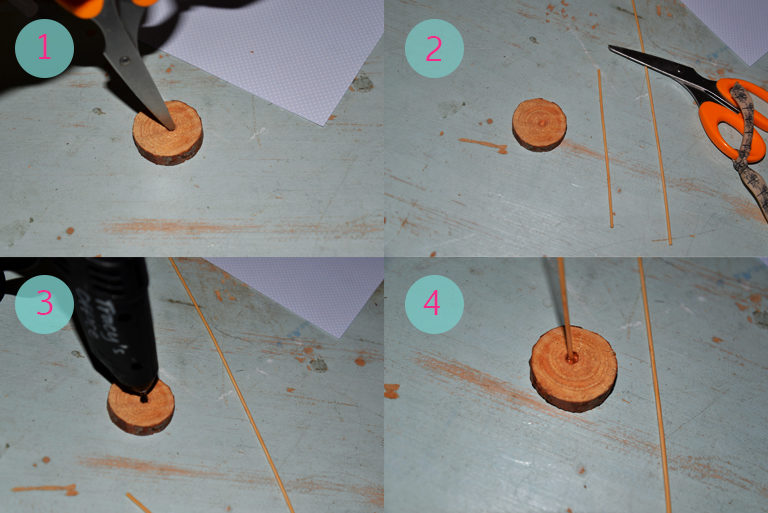
Take the wooden slice and twist the tip of the scissors into the wood to create a hole. The wood is soft so it's easy.
Step 2
Cut a wooden craft stick to a desired height to use as your umbrella stand.
Step 3 & 4
Add a drop of glue into the hole in the wood slice. Place your cut wooden stick into the glue and hold in place until the glue has dried.
Step 5
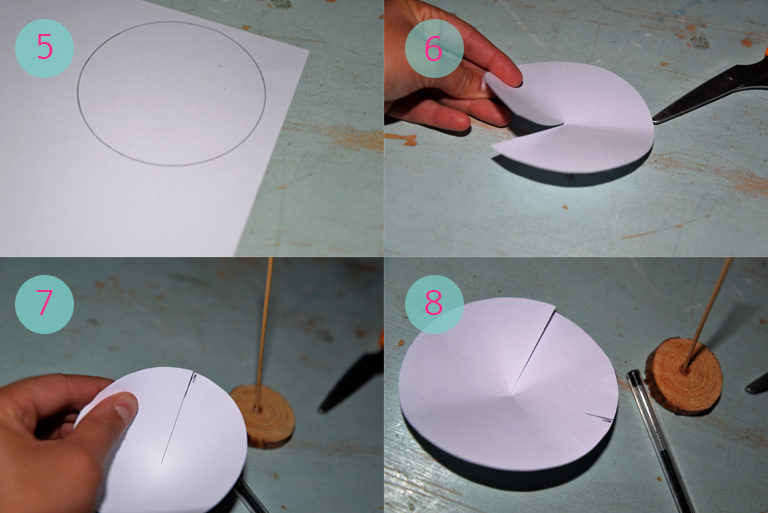
Draw a circle on the back of your patterned card. The size depends on the length of your stick to get the proportions looking correct.
Step 6
Cut your circle out and cut a straight line to the centre point of your circle.
Step 7
Cone you circle, making it as pointy as you like. Mark a line on the inside of the cone to indicate where it overlaps and how much space you lose.
Step 8
Lay your circle flat and mark the line harder on the very edge so it can just about be seen when flipped over.
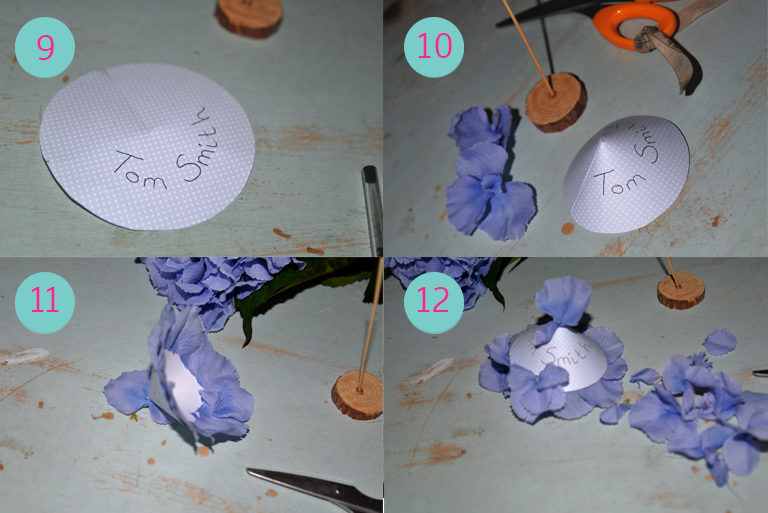
Step 9
Using the mark on the circles edge, write the name in the gap that will be seen once your circle is in its cone shape.
Step 10
Re-cone your circle and glue it in place using a glue stick/pen.
Step 11
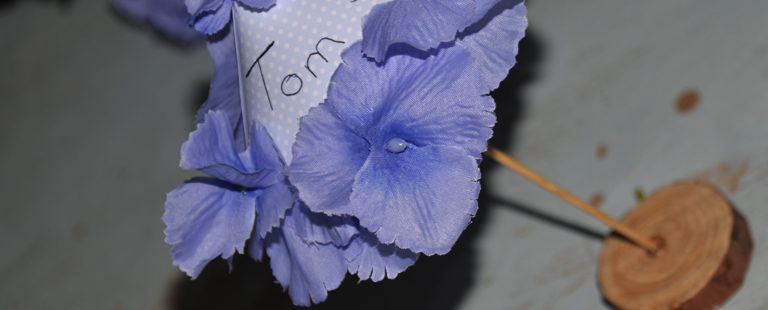
Take the hydrangea cutting off petals. Using the glue gun, stick the petals on the inside edge of the cone.
Step 12
Cutting whole heads from the hydrangea, glue them in place on the decorative side of the cone. Avoid covering the name. Glue your finished cone to the top of the stick to create your finished umbrella!
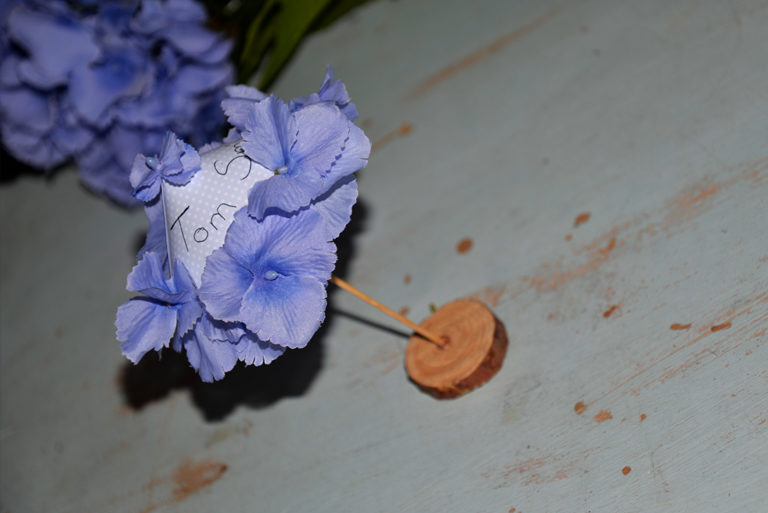
There you have it, a place name with a talking point. Now take your creativity and getting going.
Don't forget to tag us @countrybaskets